Suspension of Lazada Listing APIs during 11.11 Campaign (11-NOV-2019)

Lazada biggest Mega Campaign 11.11 is coming very soon.

To ensure smooth and consistent shopping experience of our consumers and sellers, Lazada will restrict the access to some of the services on their platform during the campaign days, and lock the products prices for campaign products.

Schedule: 10.11.2019 (00:00:00) – 11.11.2019 (23:59:59)

Seller Center APIs functions impacted are as follows:
RemoveProduct
CreateGlobalProduct
CreateProduct
UpdateProduct
MigrateImage
MigrateImages
SetImages
UploadImage

However, these API functions still available:
Update Price Quantity**
Get* (all Get APIs)

**Will not be applicable for products under campaign price and product update lock down.

For more details, kindly refer to this announcement page:
[Announcement] Suspension of Listing APIs during 11.11 Campaign

We appreciate your understanding and cooperation.
Wishing you have a wonderful sales! 😁

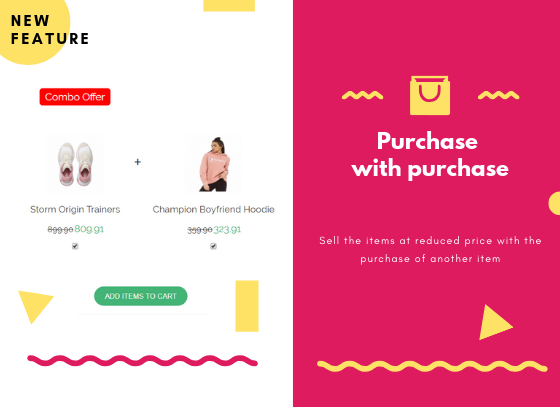
Purchase With Purchase (PWP)

Purchase With Purchase (PWP is a promotional method used to sell product items at a reduced price with the purchase of another item.

**(Only available for webShaper bizStore package)

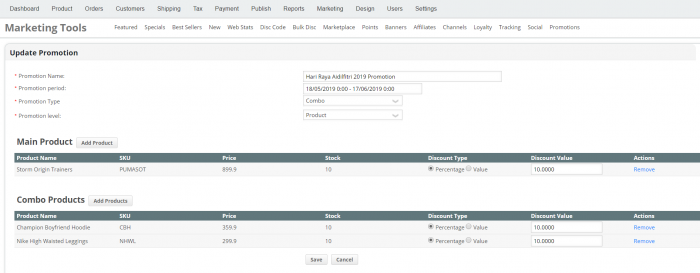
Follow the steps as below to create Purchase With Purchase (PWP).

1. Go to Marketing > Promotions.
2. Click Create.
3. Enter Promotion Name and Promotion Period for Main Product.
4. Set the same for Combo Products.
5. Enter Discount (in Percentage % or Value) for Main Product and Combo Products.

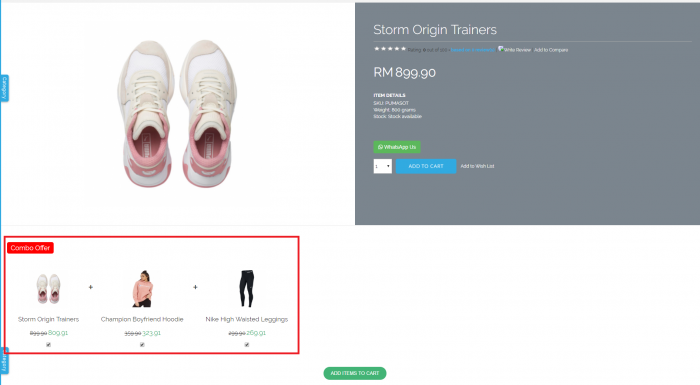
6. This is how PWP will be display on your store front.

Customer will be allow to select another product item by ticking the Combo Offer.

For more information, checkout our tutorial page of Purchase With Purchase (PWP)

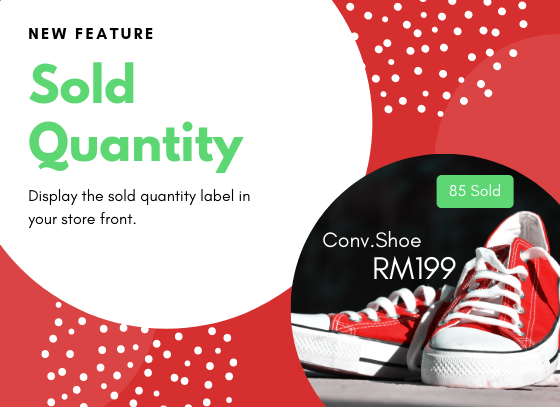
How to Display product Total Sold?

Total Sold is webShaper new feature that allows your customer to see the total sold of specific product in store front.

**This feature only available for webShaper bizStore package.

Follow the steps as below to display product total sold:

1. Login to webShaper store control panel.
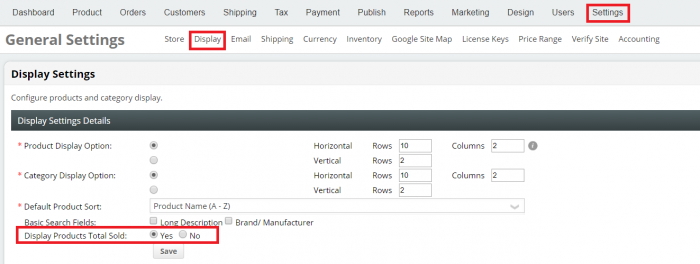
2. Go to Settings > Display.
3. Tick Yes to Display Products Total Sold.

For more information, checkout our tutorial page to Display Total Sold.

How to Print Consignment Note?

We understand that merchants always have problems with consignment notes when it comes to shipping. But don’t worry!
There are easier way to print consignment note of your preferred courier service providers (Poslaju, Citylink, Skynet, Fedex, UPS, DHL & etc).

**This feature only available for webShaper sohoStore & bizStore package.

Follow the steps as below to print consignment note:

1. Define Shipping Label Template.
i. Go to Orders and click Shipping Label Editor.
ii. Choose a template and edit the settings.
iii. Click Emulator.

2. Edit via Ship Label Emulator for Label.
i. Drag & Drop the labels to the correct position in the consignment note.
Note: You can choose additional information that you want to insert such as Company Website and Order Items.
ii. Configure your shipping label templates and Save.

3. Print Consignment Notes for Your Order.
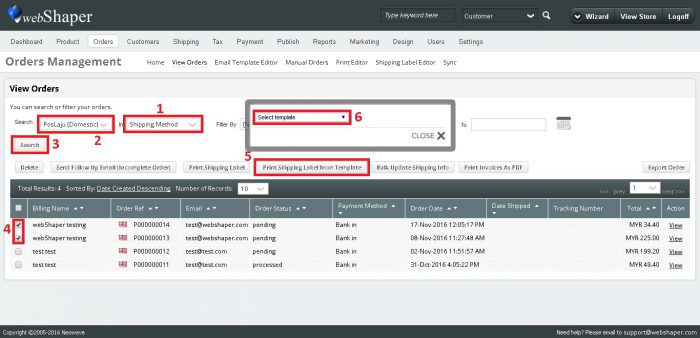
i. Go to Order > View Orders.
ii. Tick order(s) you would like to print.
iii. Click on Print Shipping Label from Template.
iv. Choose template you have created, to download consignment note as .pdf file.

Steps to Print Consignment Notes for Your Order(s)

For more information, checkout our tutorial page to Print Consignment Note.

How To Manage Customer Grouping?

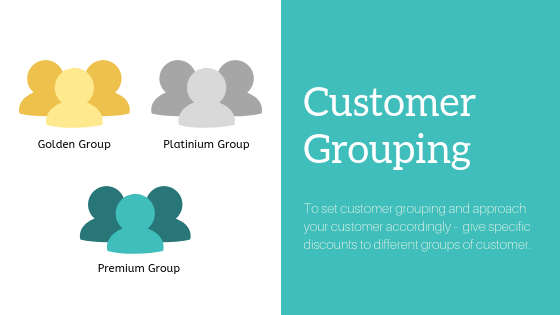
Customers are various and that is the reason you should approach them differently. Customer Grouping is a tool for you to categorize your customer and approach them accordingly.

Creating a group and adding customer to the group are main steps to use this feature. Specific discount by category and product are additional functions. If specific discount is specified, any product fall under this will take specified discount instead of initial discount.

**This feature only available for webShaper bizStore package.

Follow the steps as below to manage customer grouping feature:

1. Create group.
Insert Group Name, Discount and Apply On which product discount.

2. Add Customer to the group.

  • Assign customers to their group using email.
  • Delete customer from the group.

3. Setting specific discount by category.
Note:Every products in the category will take this discount instead of the discount you specified.

  • Manage Specific Discount by Category from drop down list.
  • Put discount percentage for each category.

4. Setting specific discount by product.
Note: Every products specified in this section will take price from here and ignore both discounts you specified.

  • Manage Specific Discount by Product from drop down list.
  • Insert SKU / Product Name, or leave it blank to display all.
  • Put in selling price on Member Price column.
  • Tick on all products that you have made changes.
  • Click on Update.
Groups of customers to set target pricing.

For more information, checkout our tutorial page to Manage Customer Grouping.